


Have you always wanted to sew smocking on a top , but thought it was too complicated? Good news: it's not! While the smocking technique requires a little patience, it remains accessible, even to sewing beginners.
In this step-by-step tutorial, we will show you how to make a summer top with smocking, using the Sandrine dress pattern .
In this article, you will learn how to modify an existing pattern, create spaghetti straps , sew gathers and of course, sew smocking on a top with elastic thread.
An excellent sewing project, which is perfectly suited to upcycling , to give a second life to your most beautiful fabrics.
The supplies needed to transform the Sandrine dress into a smocked top
The basic equipment
-
The pattern for the Sandrine dress
-
Approximately 1 meter of fabric by 150 cm width
-
Elastic thread
-
A tape measure
-
A pair of sewing scissors
-
Pattern paper
-
An erasable pen (like FriXion) or tailor's chalk
-
An iron
Recommended fabrics
For this sewing project, we suggest you choose a light and fluid fabric : cotton, double gauze, viscose, linen voile, or poplin. These materials allow for a beautiful finish to the smocking and are very comfortable to wear in summer.
What if you opted for upcycling?
This top can easily be sewn from an old sheet, a vintage tablecloth, or a lightweight vintage curtain.
At Maéli Paris, to create this smocked top, we decided to repurpose a pretty kitchen towel, striped blue, yellow and red, which we were able to find during our trips to textile sorting centers .
Preparing the pieces for sewing the smocked top
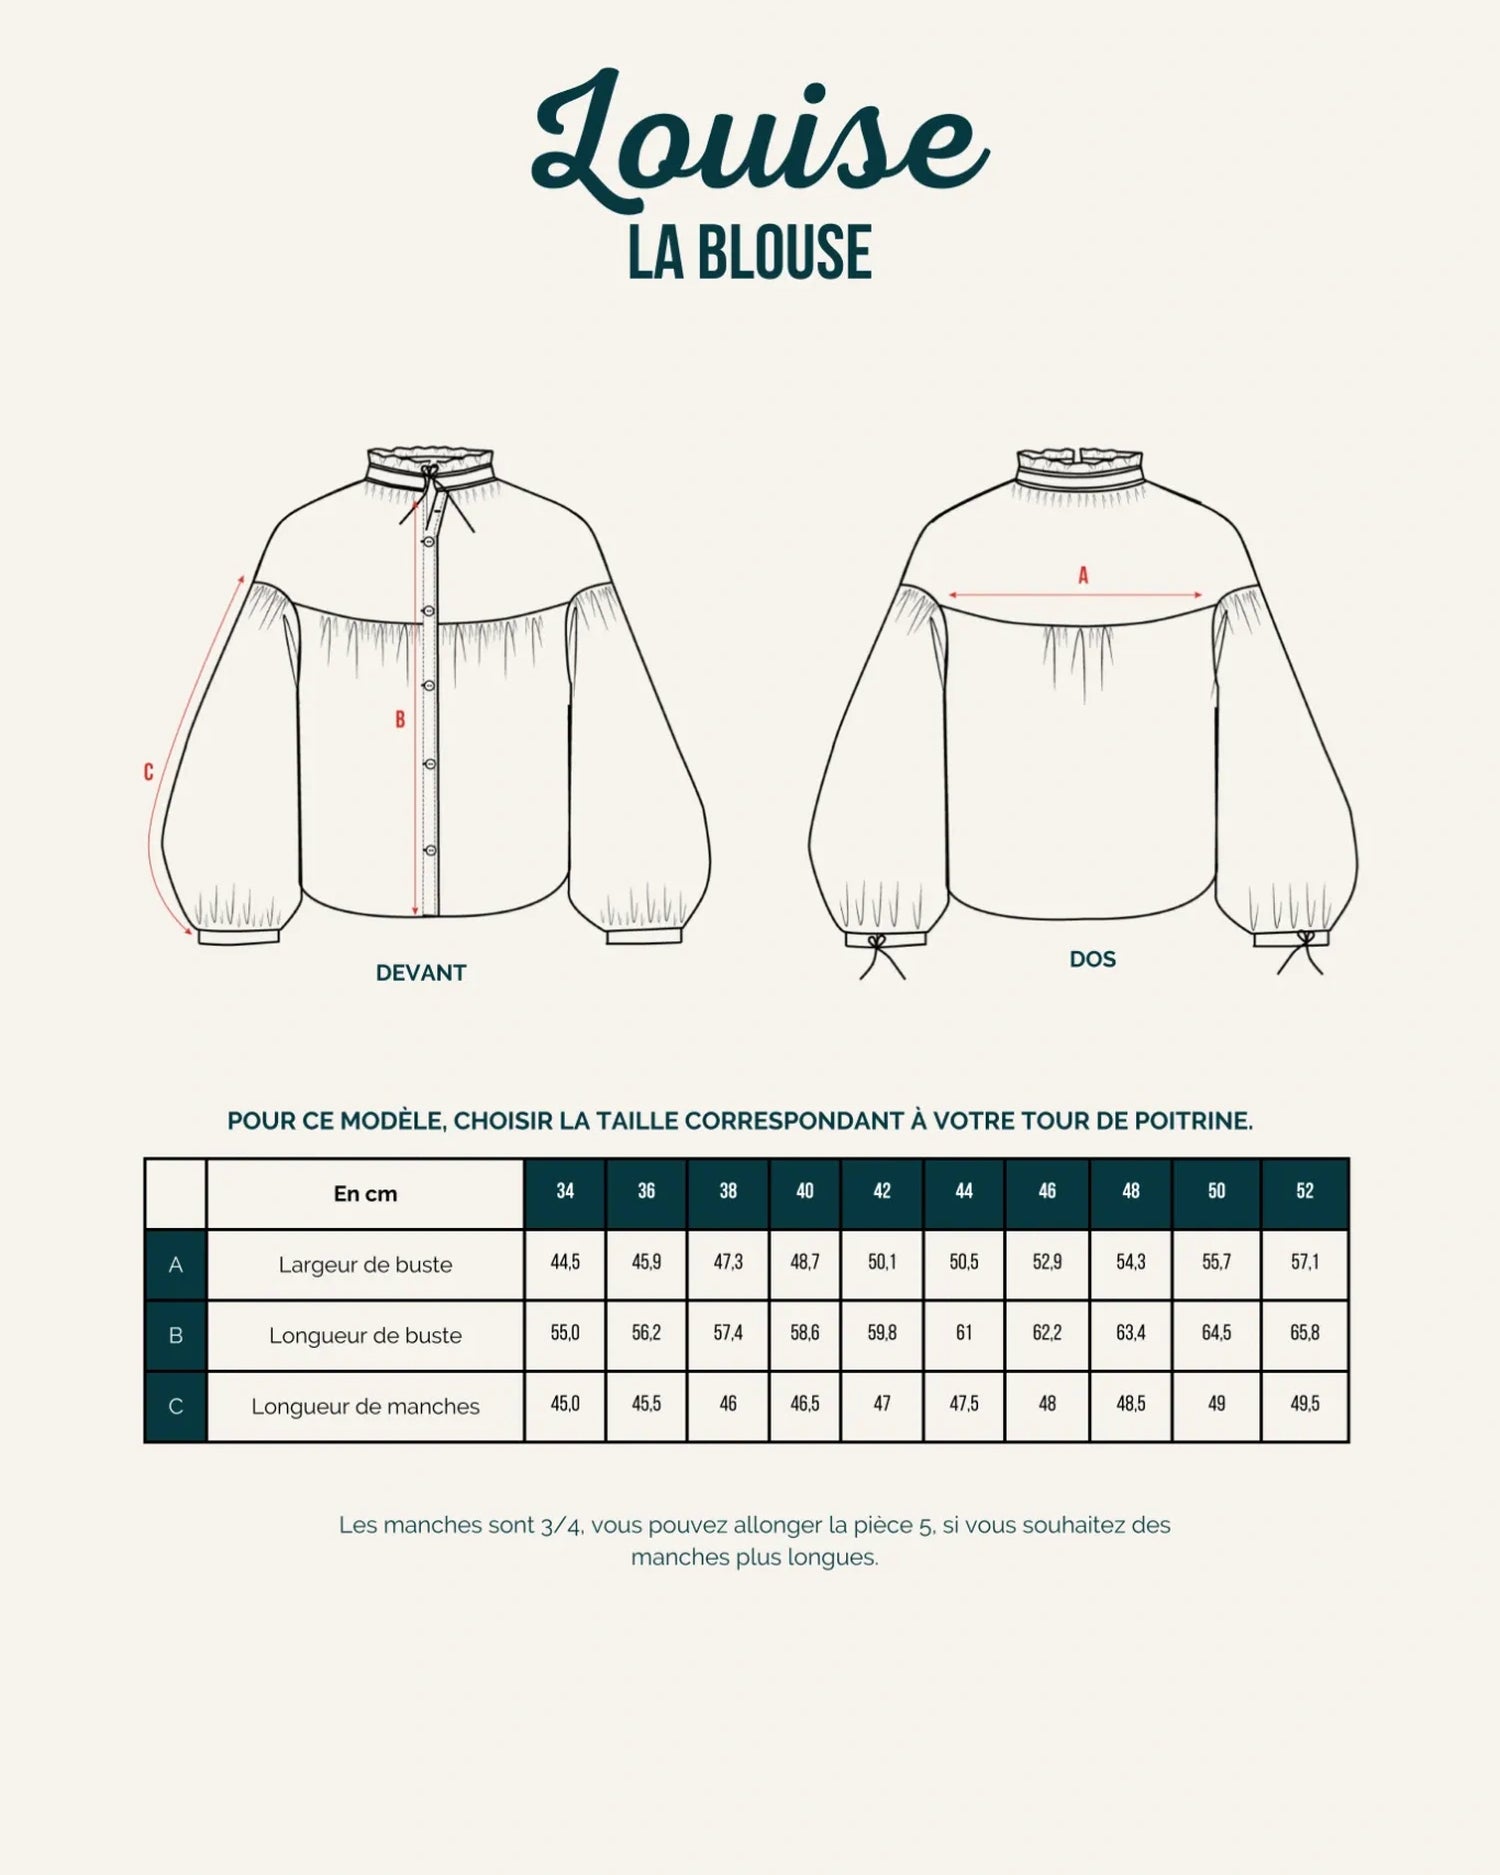
For this Sandrine dress sewing hack, you will only need the center front bust piece (piece no. 1) and the side front bust piece (piece no. 2).
These patterns will need to be modified according to the instructions detailed below. Remember to cut them twice from your fabric, as the front bodice will be lined .
All other pattern pieces are not to be used to make this top.
For the rest, you'll need to create new inserts. We'll explain everything later in this article.

The pattern pieces
Trace or cut out the center front bust and side front bust pieces (pieces #1 and #2).
For this project, you will need to shorten them by 4 cm from the bottom, as shown in the diagram below.
The parts to be created
You will need to create three new pieces essential to making your smocked top.
Please note : we sewed this garment in size 36. The measurements provided are therefore based on this size. If a measurement needs to be adjusted for other sizes, this will be indicated. Otherwise, you can consider the given measurements suitable for all sizes.
-
The low basque : cut out a rectangle 23 cm wide x 122 cm long.
The larger the size you choose, the fewer gathers there will be on the peplum. If you want more gathers, you will need to lengthen the rectangle.
-
Spaghetti suspenders : to create the suspenders, cut a strip of fabric 2.5 cm x 150 cm.
-
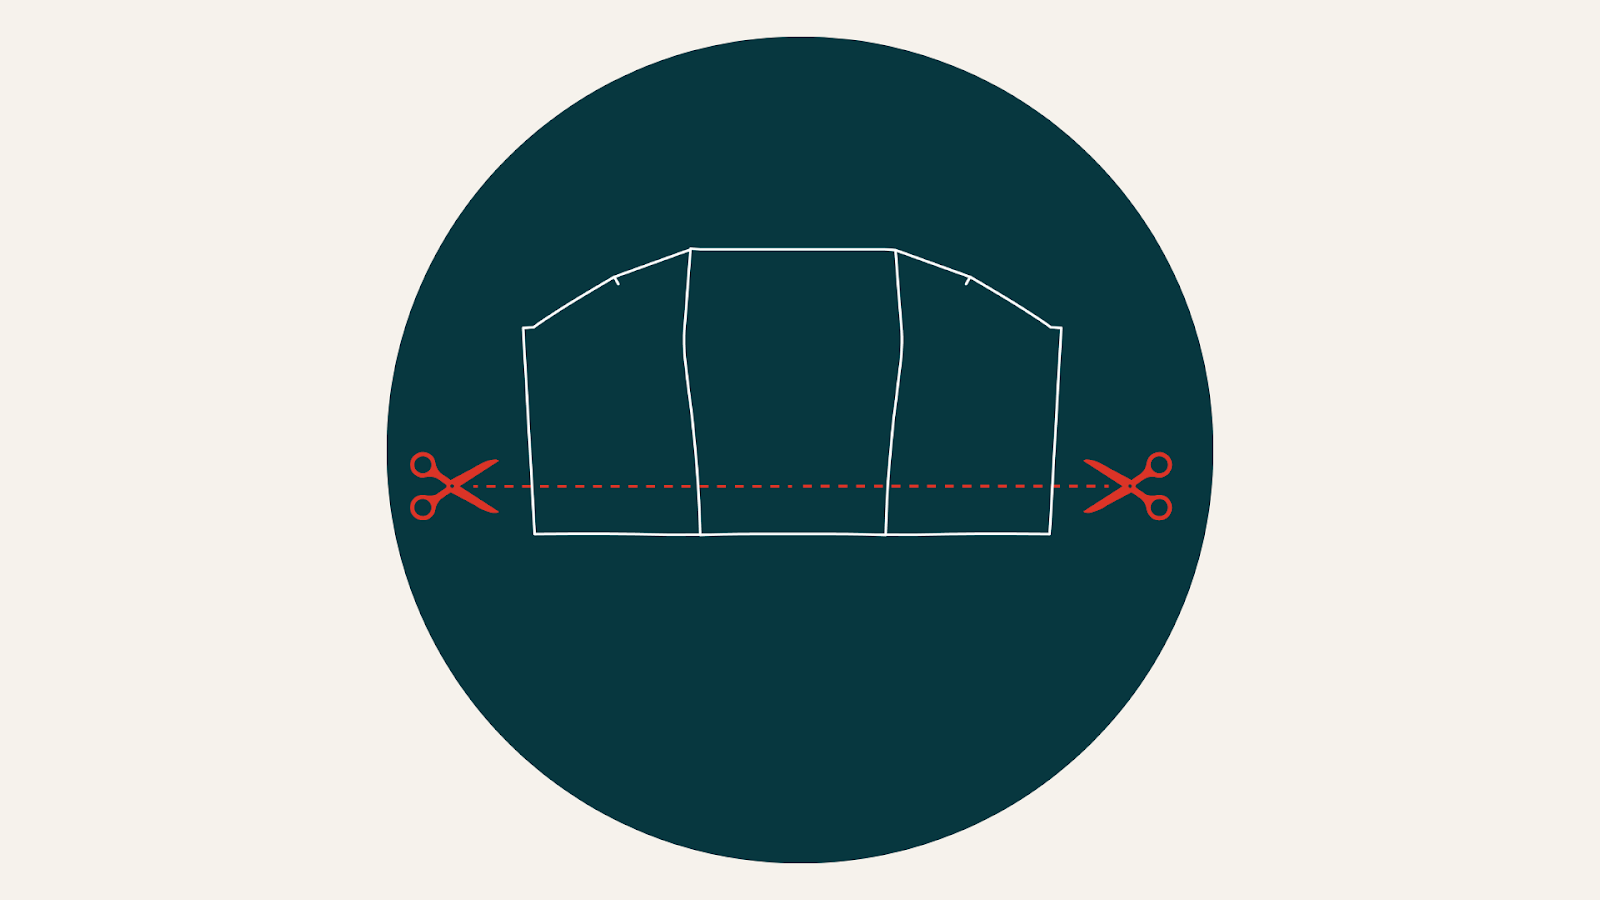
Back bodice : For a size 36, you can cut a rectangle 15 cm high x 42 cm wide. For other sizes, adjust accordingly.
-
-
the height of this yoke in relation to the height of the bust on the front side (piece no. 2)
-
The length of this yoke is determined by the width of your back (measured from the widest part). Then multiply this figure by 1.5 to obtain the length of the yoke to create.
-
Steps to sew smocking on a top
To sew this little smocked top , you will need to follow the step-by-step guide for the Sandrine pattern, but only for step 2.4 . For the rest, refer to the steps shown below:
-
Cut out the pattern pieces directly or trace them onto special pattern paper if you wish to keep the original intact for other versions.
-
Cut your pieces from the chosen fabric, respecting the grain line.
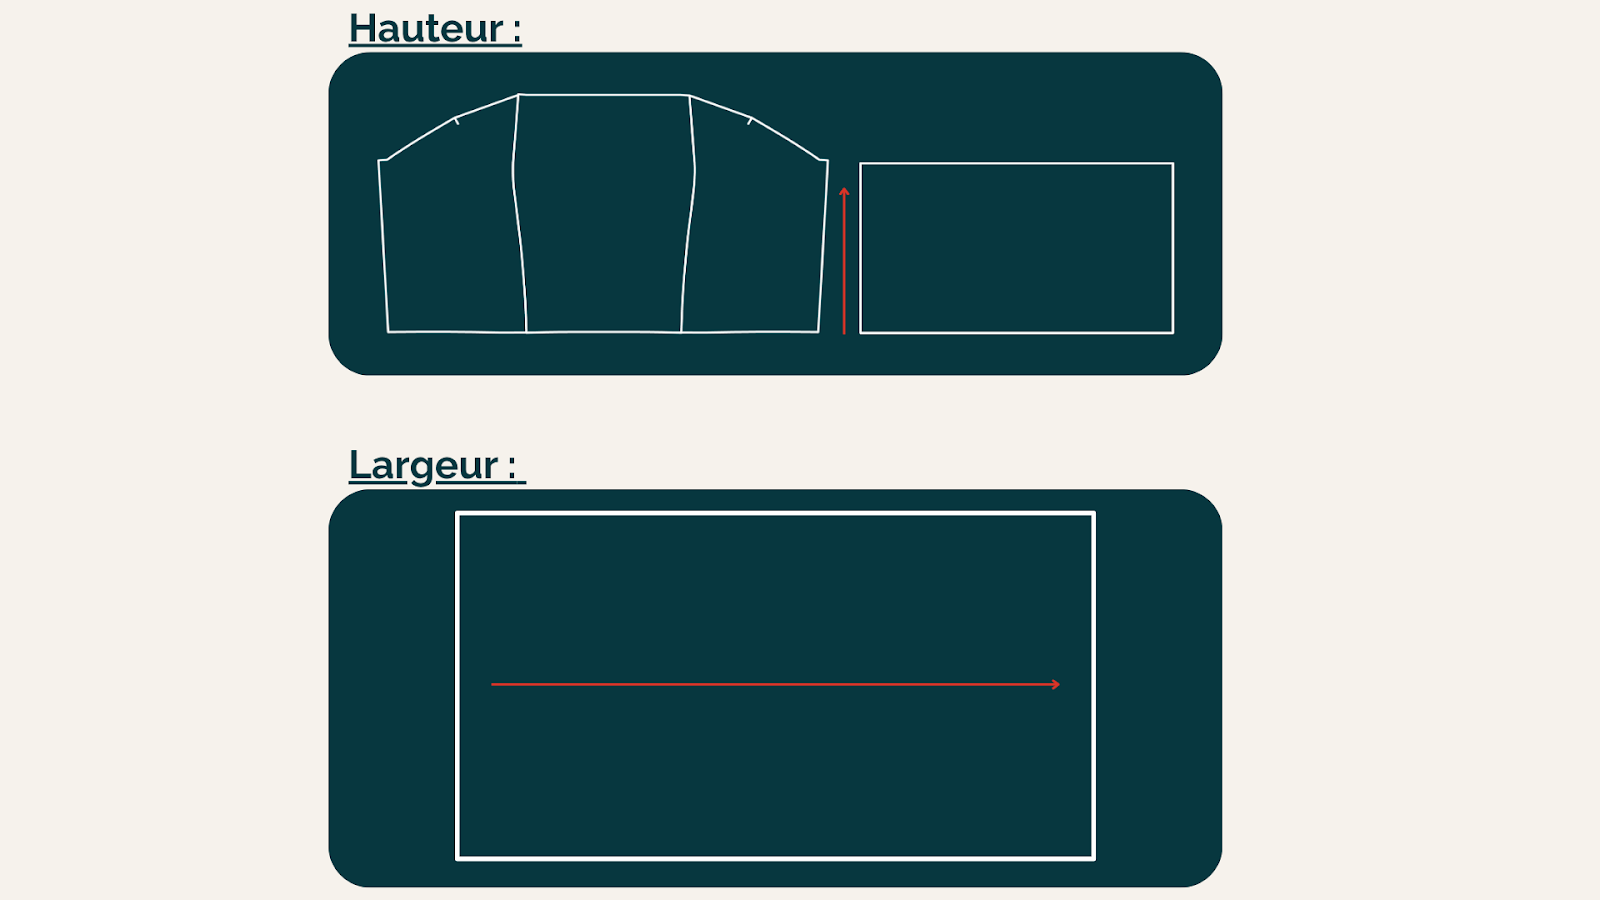
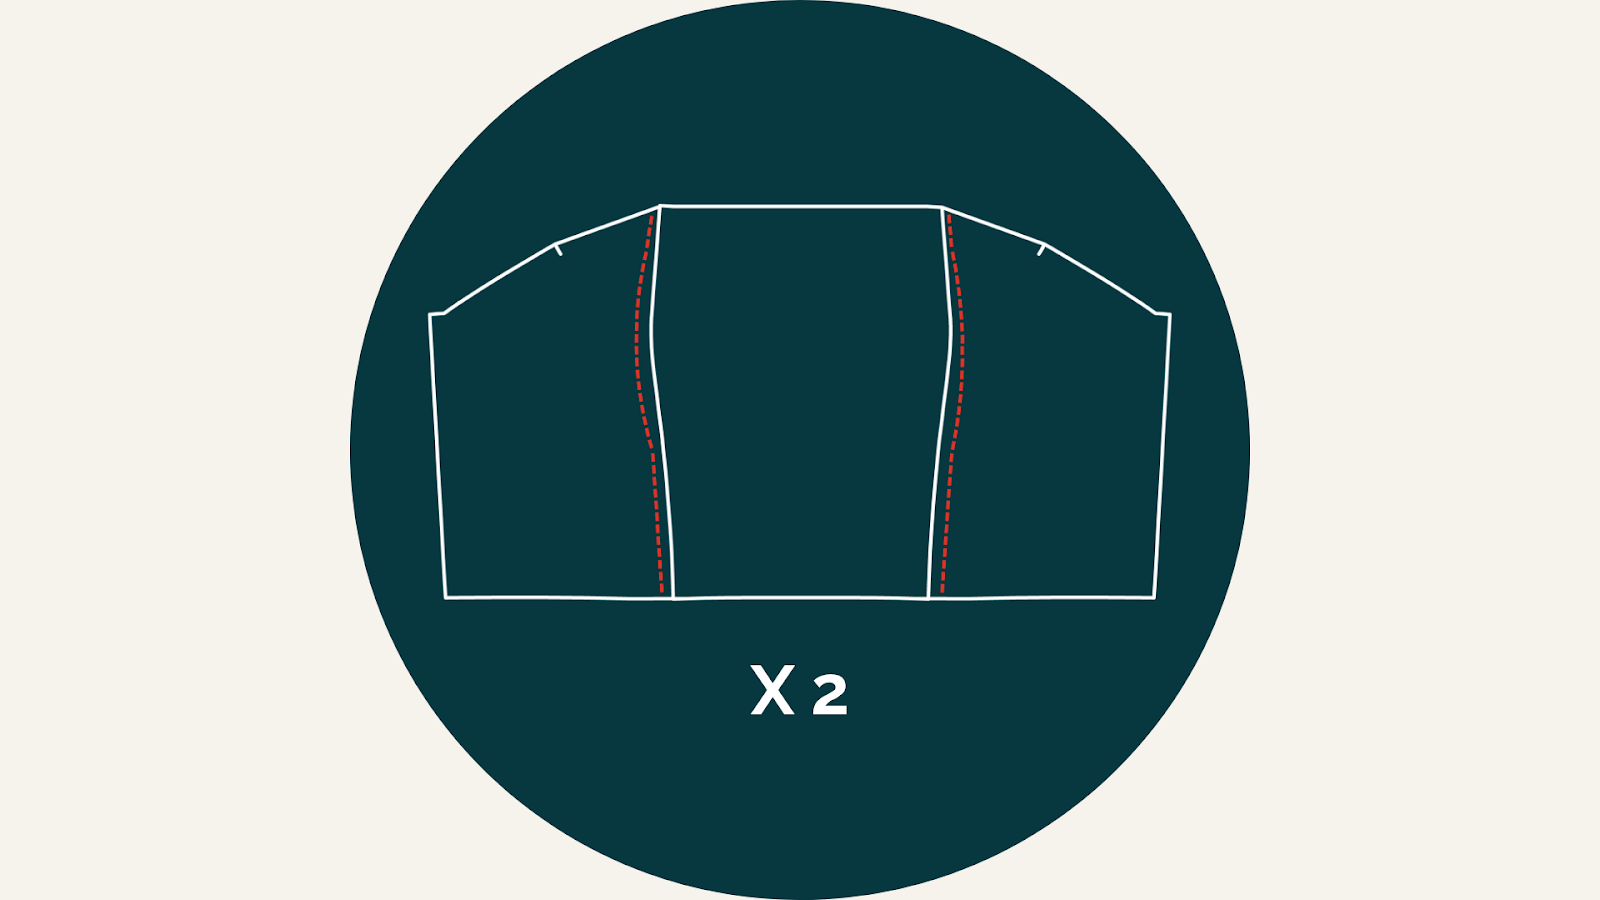
Step 1: Creating the front bodice
This step corresponds to step 2.4 of the step-by-step guide.
This involves assembling the sides of the center front bust pieces (piece no. 1) and the side front bust pieces (piece no. 2).
Note that, as indicated in the guide, you must perform this step twice if you wish to double the front bodice.
Step 2: Preparing the torso and back
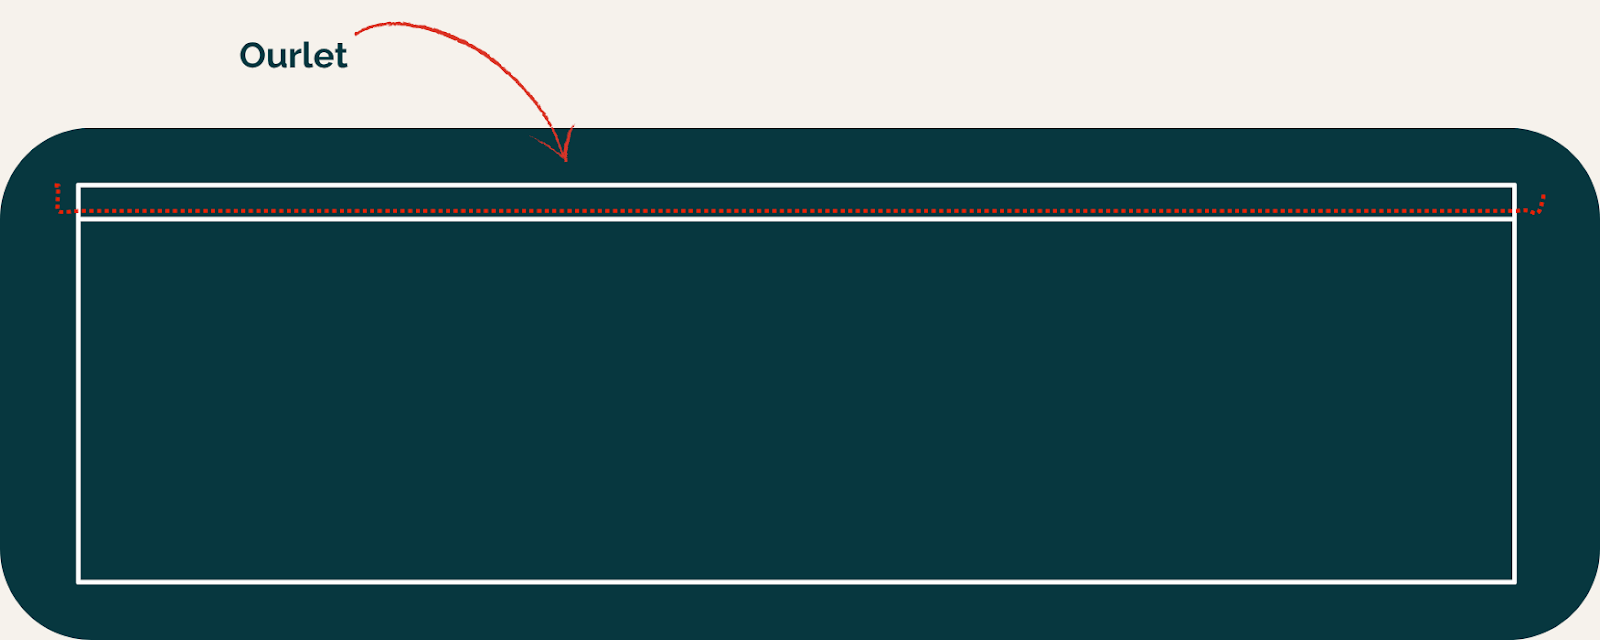
For this step, take your bodice and back pattern piece and hem the top edge. To do this, fold over 1 cm, then fold over another 1 cm. Press flat with an iron, then stitch 0.8 cm from the edge to secure.
This hem will be the starting point for your smocking to be done in the back of the top.
Step 3: Sewing the smocking onto the back bodice piece
We now move on to sewing smocking on the back bodice yoke.
-
First, draw horizontal lines every 1 cm across the entire width of the piece using a FriXion pen or tailor's chalk. These lines will serve as guides for sewing.
-
Prepare your machine with elastic thread . Wind the elastic thread onto the bobbin (by hand, being careful not to pull it too tight) and put regular thread (in a color that matches your fabric) onto the spool. Sew with a straight stitch, 3 mm long.
-
Sew the smocking along the pre-drawn lines. Remember to backstitch at the beginning and end of each seam. Your fabric will naturally gather thanks to the elastic thread.

Step 4: Preparing the spaghetti straps
Fold the spaghetti strap strip, right sides together, lengthwise.
Sew 1 cm from the edge to secure. Turn right side out using a bias tape turner or a safety pin.
Finally, cut the strip of fabric into four equal pieces (approximately 37.5 cm each).

Step 5: Assembling the front and back bodice
The back bust yoke thus created replaces the back bust piece (piece no. 3) initially planned on the pattern.
To position the straps, you can use the AB notches indicated on the front side bodice piece (piece no. 2) of the pattern to transfer them to the front and back bodice pieces as follows:
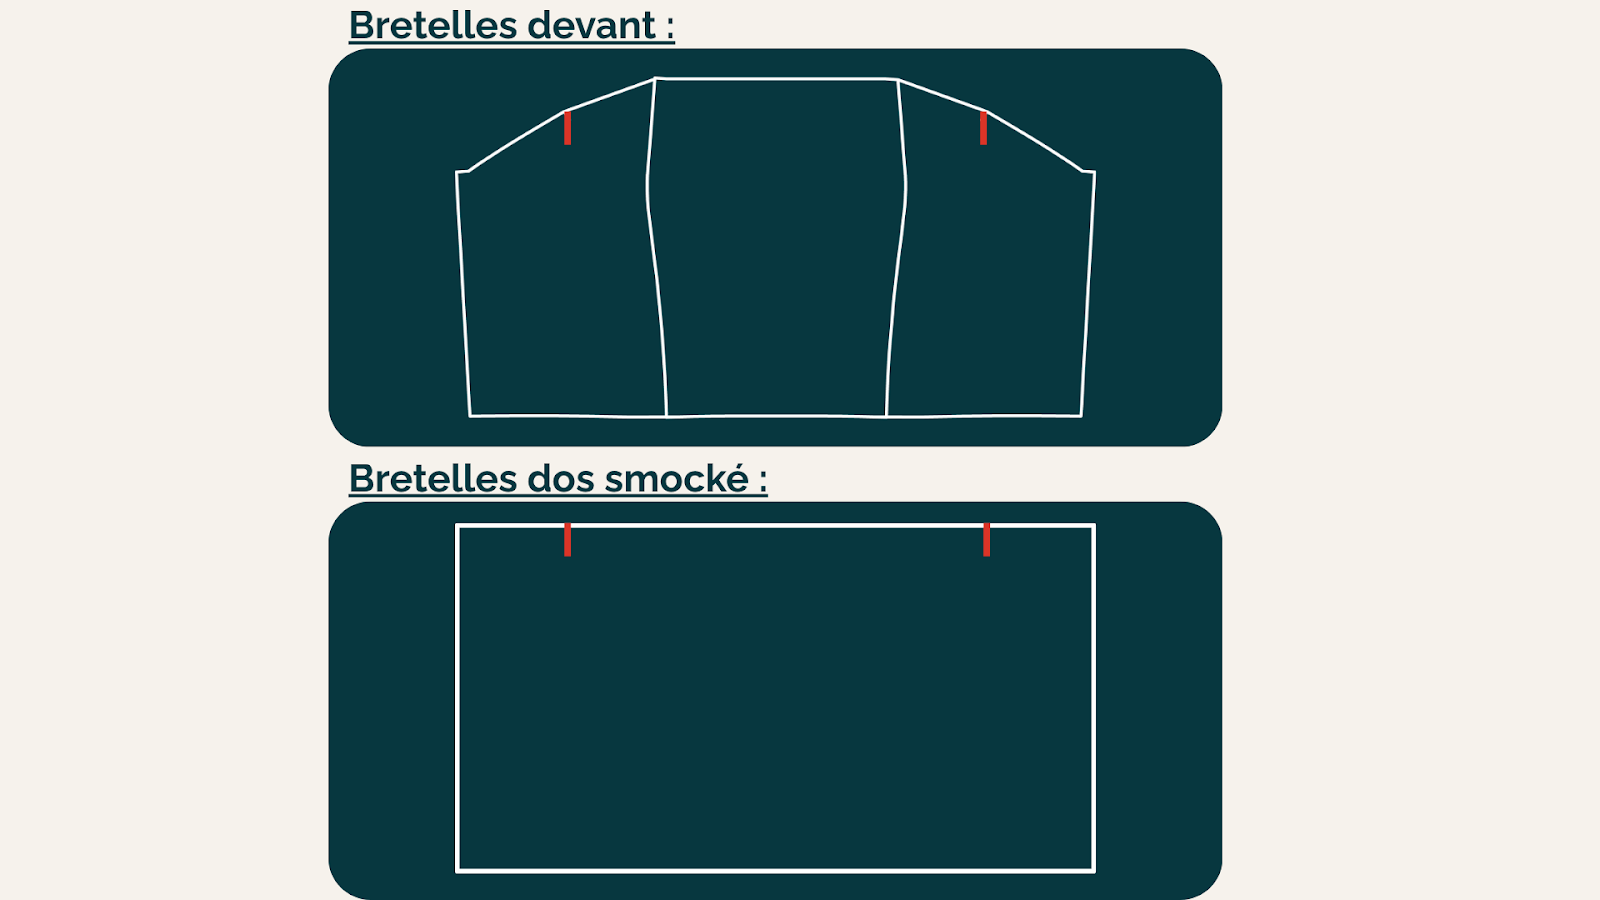
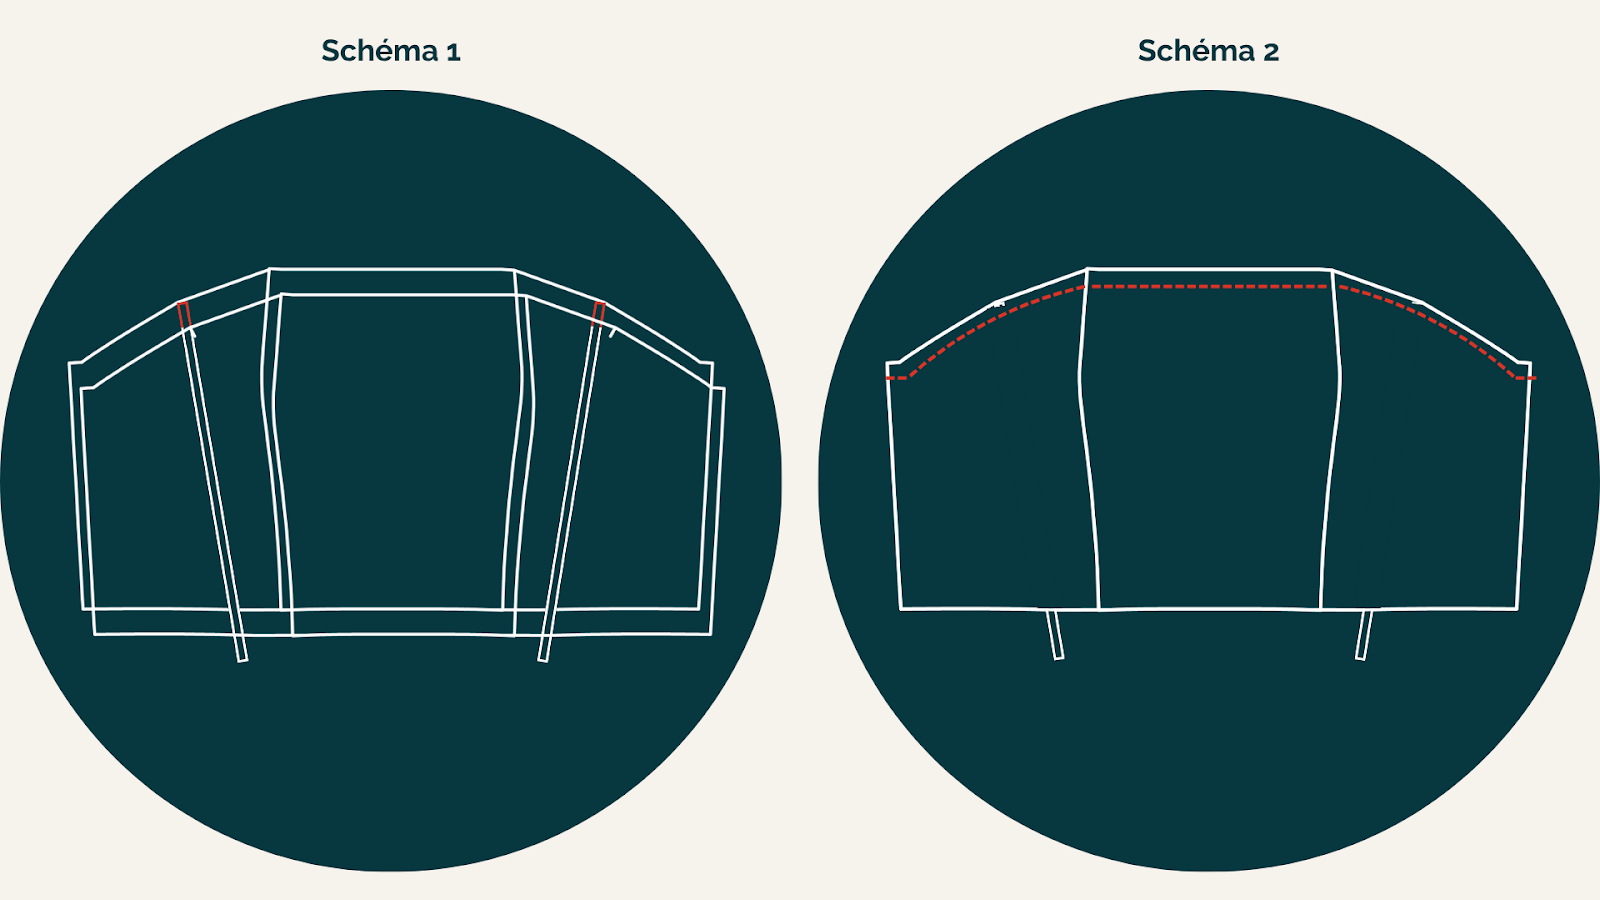
Insert the straps between the two front bodice pieces (diagram 1), then sew along the top of the two pieces (diagram 2).
Finally, assemble the sides of the front bodice (the piece you just made) and the back bodice. Place your pieces right sides together, pin them, and then sew 1 cm from the edge.
The top is now assembled from the top and sides.
Step 6: Assembling the gathered basque
The smocked top is almost finished , all that remains is to sew the low peplum.
To begin, assemble the sides of the lower basque, right sides together, to form a circle.
Make a hem at the bottom (with a double fold of 1 cm), then make two gathering lines at the top .
Pin and attach the lower peplum to the bodice, right sides together. Stitch 1 cm from the edge, then overlock the seam.
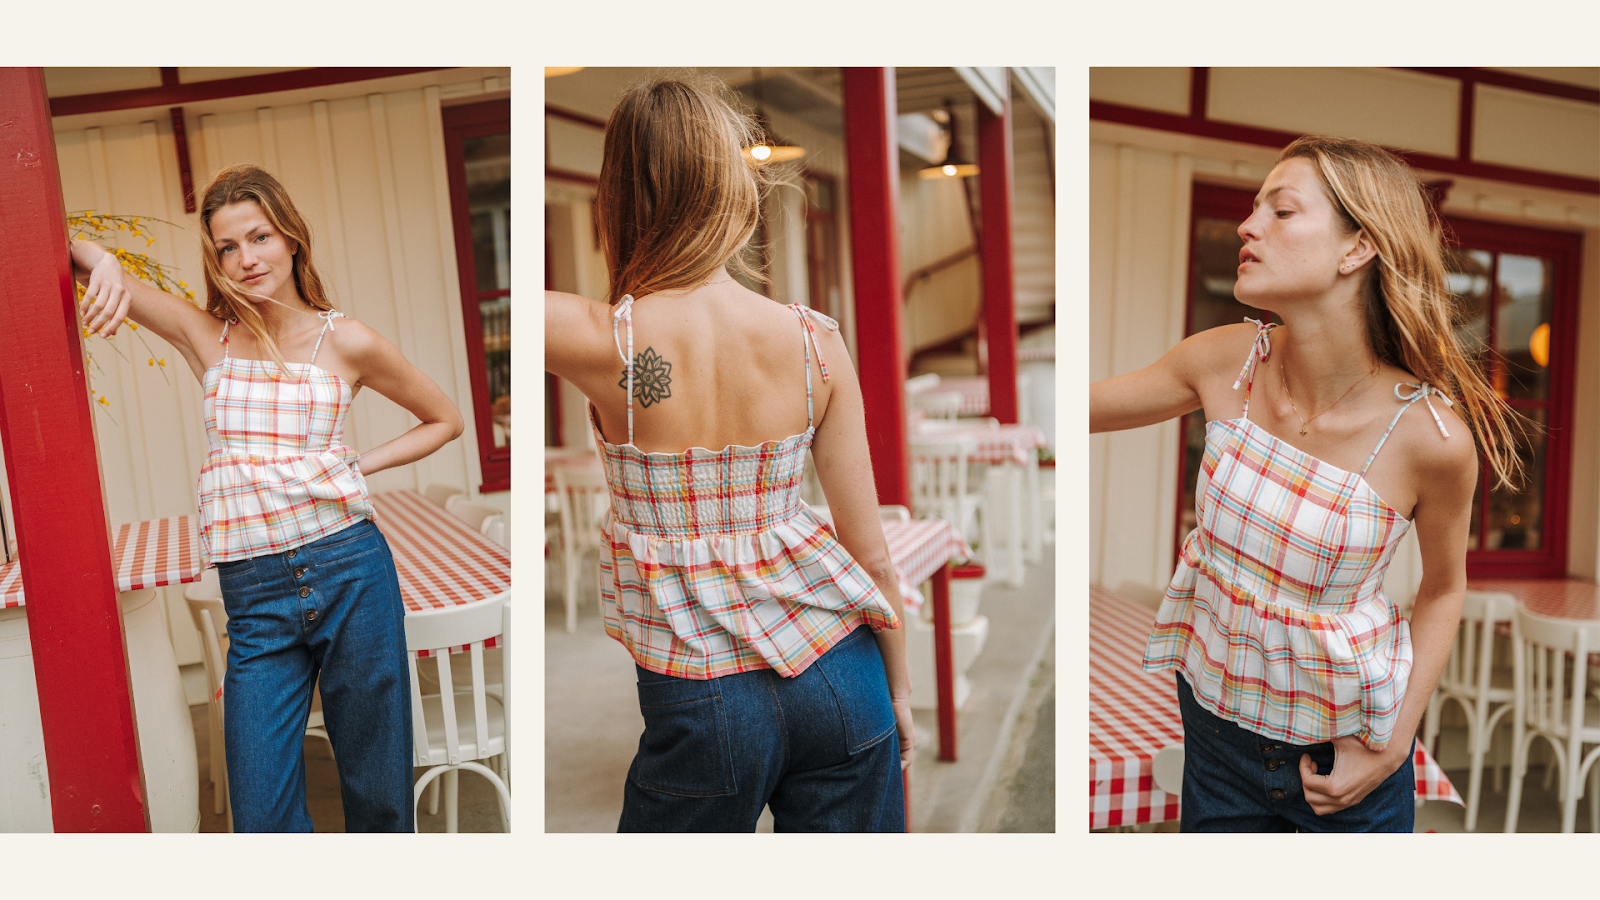
The result: a lovingly handmade, smocked summer top
And there you have it, your smocked top is ready. A lovely, accessible sewing project that combines style and comfort.
You have learned to:
-
Sewing smocking onto a top
-
Make spaghetti straps
-
How to assemble a top with a gathered peplum
This top pairs perfectly with high-waisted shorts, a flowy skirt, or wide-leg trousers. An ideal piece for summer, available in a variety of upcycled fabrics.
Want more sewing tutorials?
Head over to our sewing blog, Maéli Paris, for even more ideas, tips, and hacks for our patterns. 🌿
Did you sew this top? Share your creation on Instagram with the hashtag #MaeliParis !