


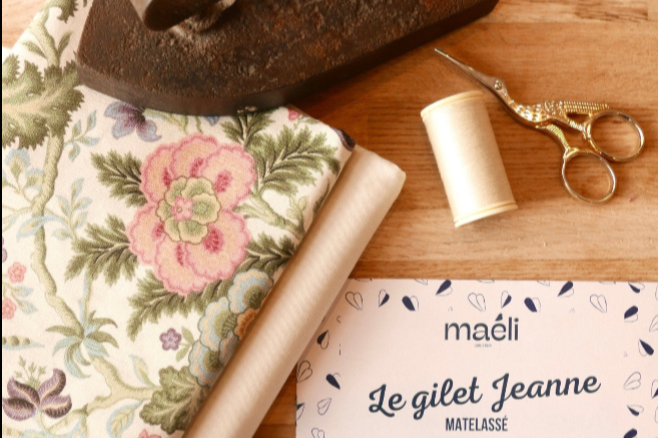


The shepherd's vest is THE timeless piece that embodies French elegance and warmth. Its relaxed yet stylish look makes it a popular choice for chilly winter days. What makes this garment so special is its endless variety. Whether it's plain, Liberty print, shearling, fur, or quilted, it's perfect for wearing over blouses , dresses , or simply as part of your loungewear! Whatever your style, the sleeveless vest suits all tastes and occasions.
Whether you're a beginner or a seasoned pro, at your dining table or in your workshop, you'll discover all the steps to create your own shepherd's vest, as well as tips for personalizing this winter essential. You can also follow the video tutorial right here .
So, get your fabric and sewing machine ready, and let's begin this sewing adventure!
For this tutorial, you will need:
- A sewing machine ,
- 5 m diagonally,
- A Frixion pen,
- Thread matching the bias binding
- 60 cm of outer fabric (140 cm wide),
- 60 cm of lining (width 140 cm),
- 60 cm of wadding (width 140 cm).
To choose your size, follow the size guide just below:

Steps to follow for sewing the vest
Step 1: Find the perfect fabric!
 The choice of fabric should reflect your desires and tastes. Treat yourself; the sleeveless vest should meet your expectations.
Depending on the desired result, feel free to upcycle sheets, curtains, or tablecloths that you no longer use! Just make sure the fabrics complement each other in terms of texture and color for a harmonious result, especially if you want your vest to be reversible!
Step 2: Cutting and preparing the fabrics…
 Before you begin preparing your fabrics, you will need the pattern. To get it, simply click here and download the PDF.
Now we can move on to preparing the pieces of your little shepherd's vest!
Cut the fabric , lining, and wadding following the pattern. Note that the 1 cm seam allowances are already included!
Step 3: The quilting process!

This step is optional if you want a vest without quilting!
If you would like to add quilting for a little extra touch, follow these steps:
- Start by assembling the wadding and the main fabric.
- Pin the edges together using pins and sew a zigzag stitch around the edge all the way around.
- Use a washable pen (like a Frixion pen ) to trace the quilting lines, following the pattern. The pattern will disappear with the heat of an iron. The quilting lines can be vertical or take other shapes (diamonds, curves, etc.). Let your creativity flow! We've suggested quilting shapes on our pattern, which you can adapt to your preferences.
For even quilting:
- Set your machine to a stitch with a 3.5 mm spacing and create straight lines following your lines.
- Start by quilting the center of your fabric, then quilt to the right, then to the left. This helps balance the quilting for an even result. The seams should be even for a neat finish. It's not necessary to backstitch at the beginning and end of the quilting seams.
Step 4: Assembling the vest!
 Sew the back and front pieces together, right sides facing, then sew the shoulders and sides 1 cm from the edge.
Press the seams open with an iron.
Repeat the same process for the lining.
Step 5: Assemble the main fabric and the lining
Position the main fabric and the lining wrong sides together, matching the edges.
Secure the two layers together with pins. Be careful to position the pins correctly on the seams (shoulders & sides).
Step 6: Bind the seams with bias tape
Finish the armholes and edges of the vest with bias tape. Place the pre-folded bias tape on the edge of the vest, wrong side facing. Sew 8 mm from the edge. Fold the bias tape to the right side and topstitch 8 mm from the edge.
Step 7: Place the ties in front
Create the links from the bias.
Cut out two 50cm strips.
Stitch the folded bias tape 1 cm from the edge.
Secure the tie at the pattern markings with a light topstitch.
The result
Well done! Your quilted vest is ready!
Feel free to share your version of the Jeanne vest on our Instagram account using the hashtags #GiletJeanneMaéli or #MaeliParis. We can't wait to see your creations and hear your feedback on the pattern tutorial!
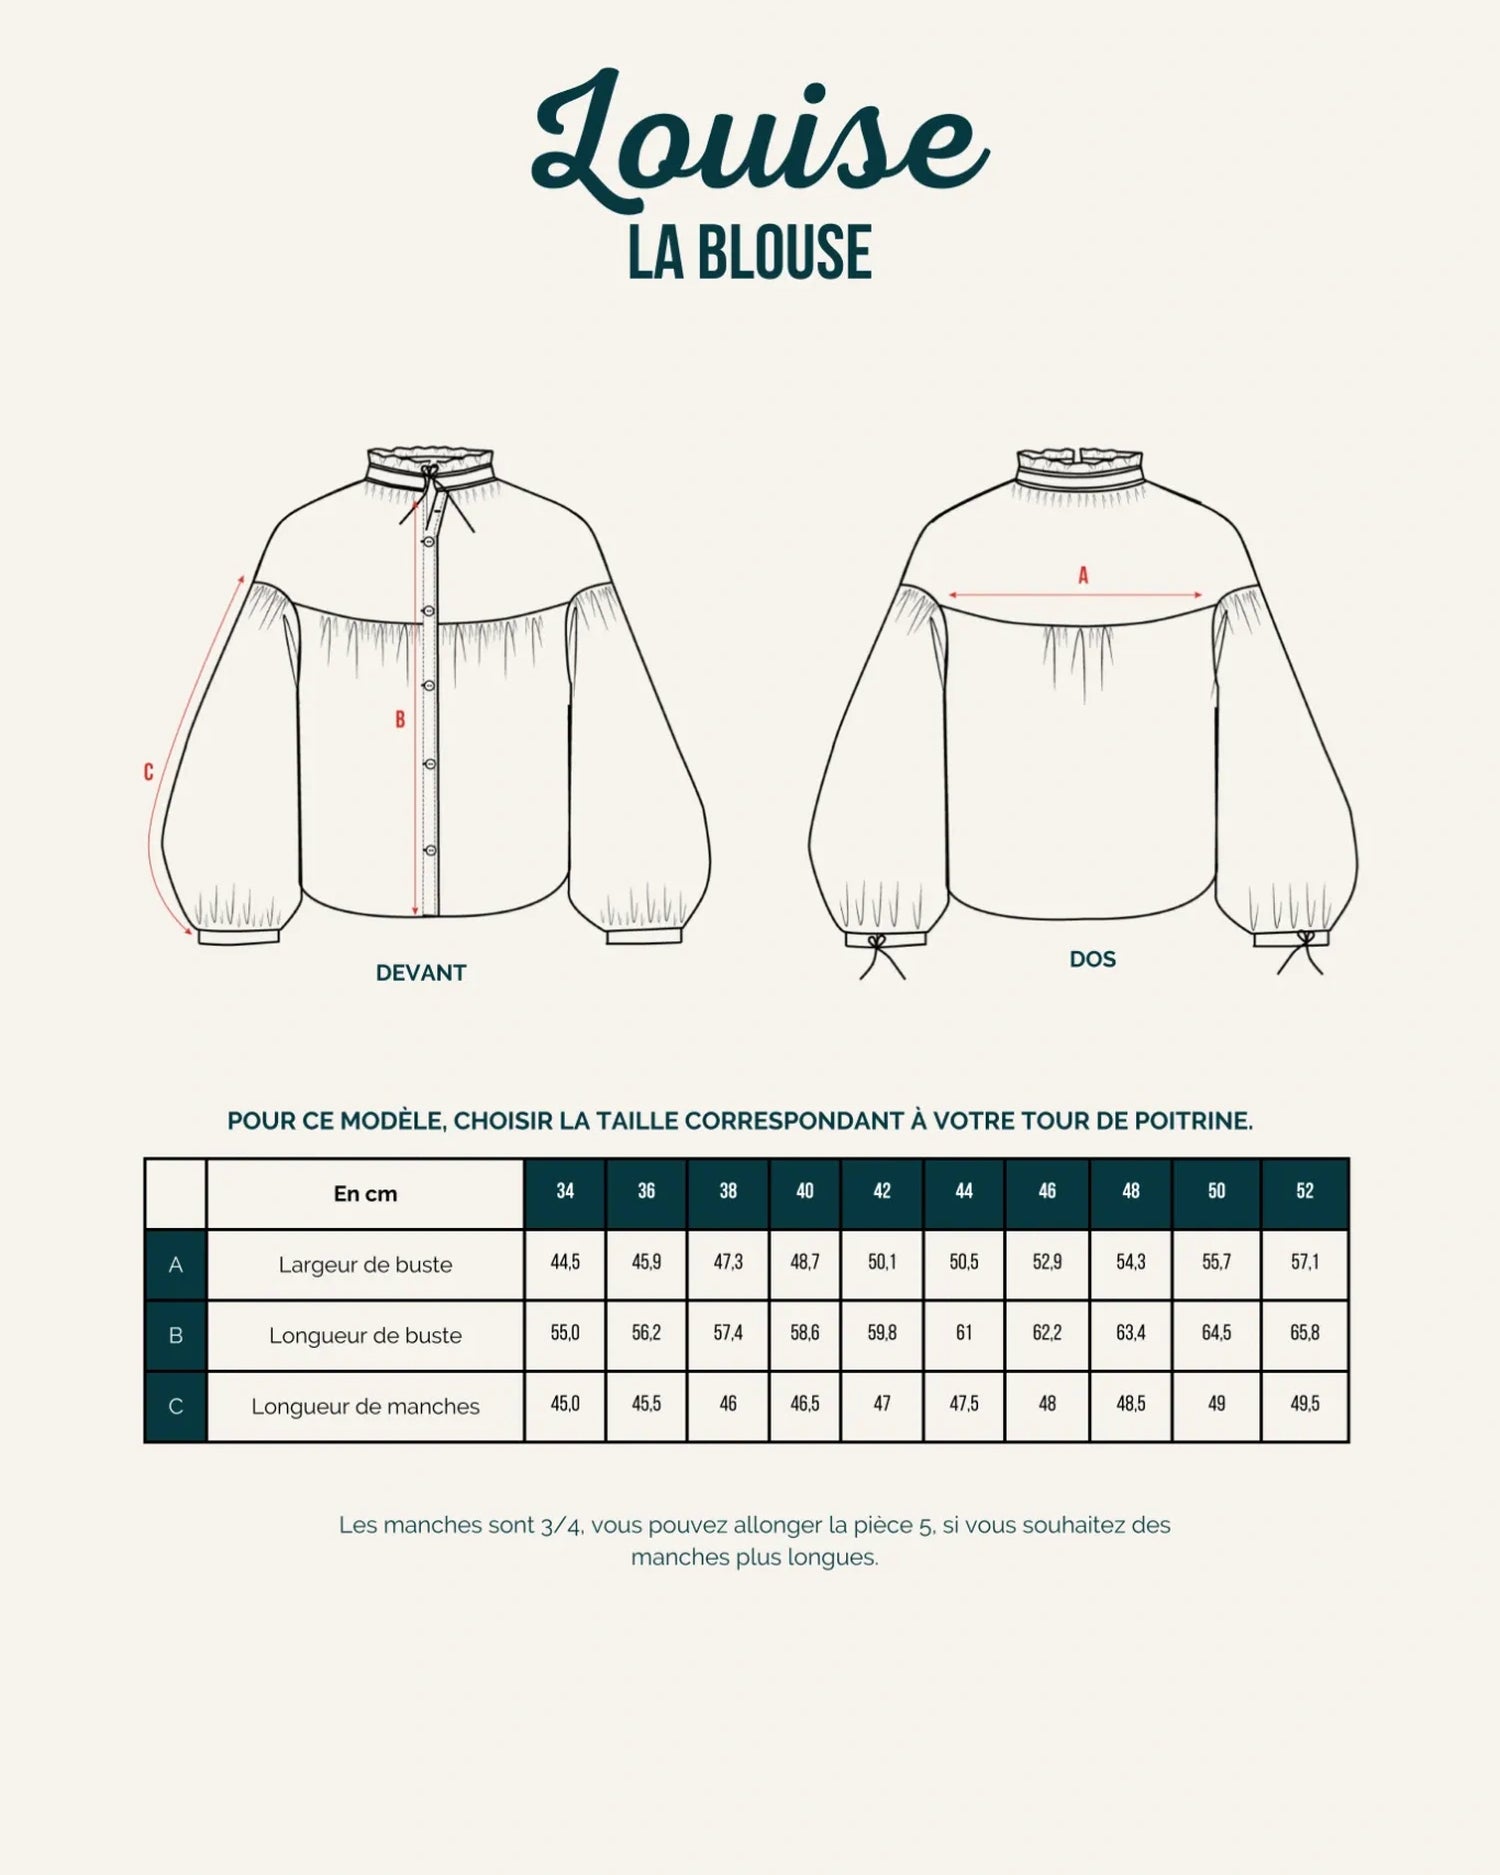
And if you're lacking inspiration for how to style your sleeveless vest, we've got a few pieces that will go perfectly with this little vest: the Louise blouse and the Clémentine shirt , for example! And if you'd like to try your hand at new sewing projects, you can find our other patterns right here .


Comments
Très joli rendu. Rapide à fabriquer. Fait avec coutures invisibles donc réversible. J’ai juste fait l’encolure un peu plus ouverte. Patron nickel
Très beau rendu pour ce gilet réalisé en taille 36. Merci
Bonjour
Bravo pour vos réalisations
Où trouver le patron du gilet réalisé dans le tuto
Merci
Bonjour
Bravo pour vos réalisations
Où trouver le patron du gilet réalisé dans le tuto
Merci
Evening
I am so sorry, however I do not speak French 🙏🏻. I am excited to try your Jeanne Vest free pattern, however when I click the link for the pattern – it says it is not available. Please May I be sent a copy of your lovely Vest – the Jeanne 😍.
Many thanks
Deb
Merci pour ce partage de patron . J’ai cousu mon gilet , ma belle-fille en veut un ainsi que pour ma petite fille. Vos explications sont claires , ce qui simplifié la vie d’une couturière non aguerrie comme moi.