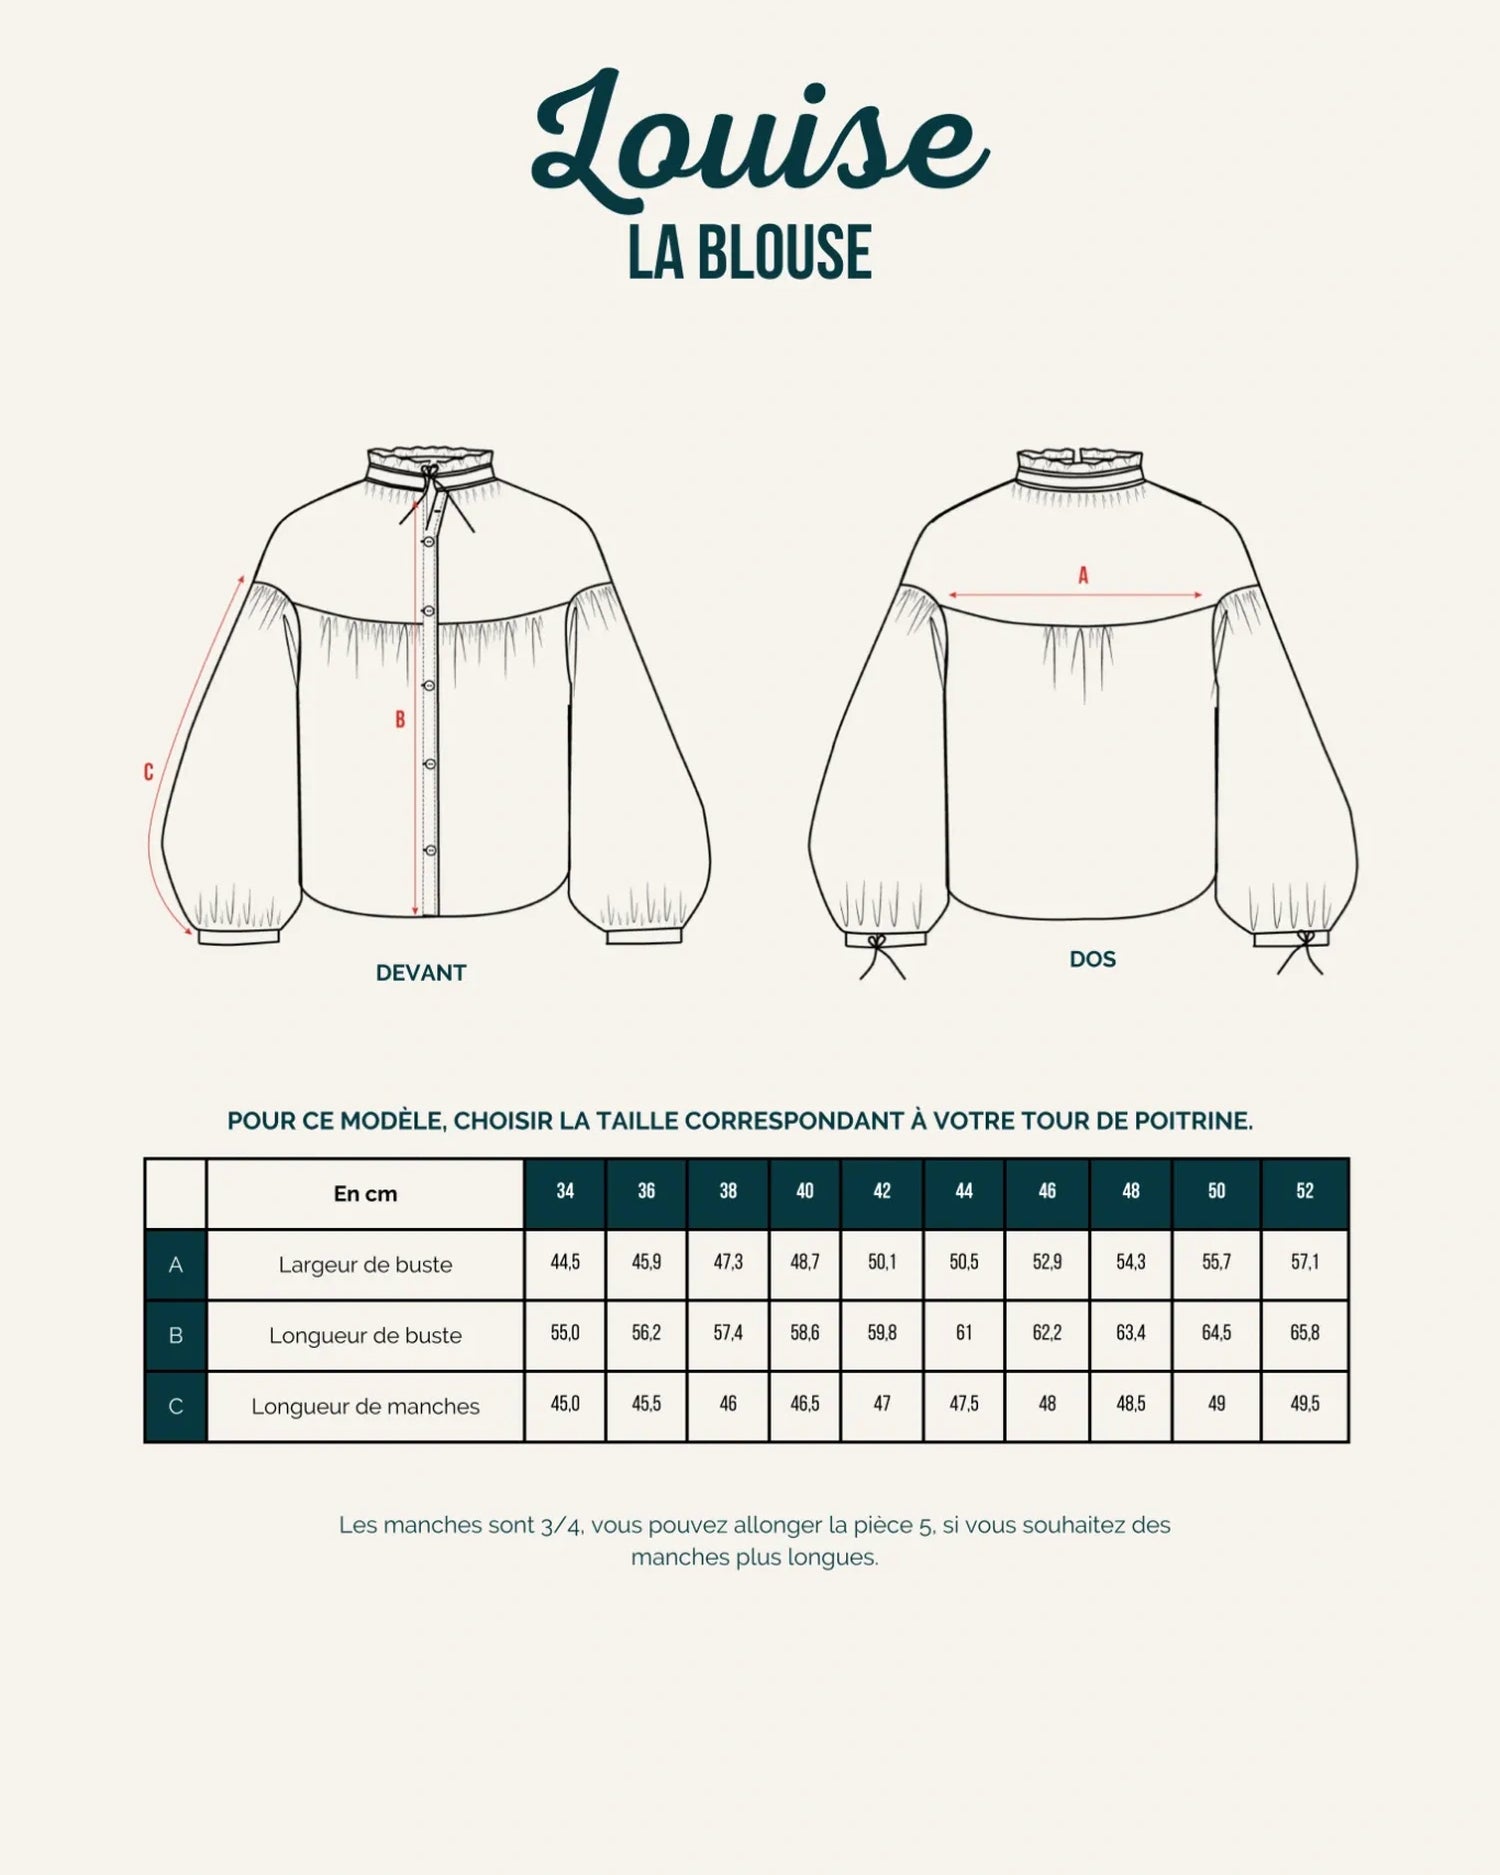

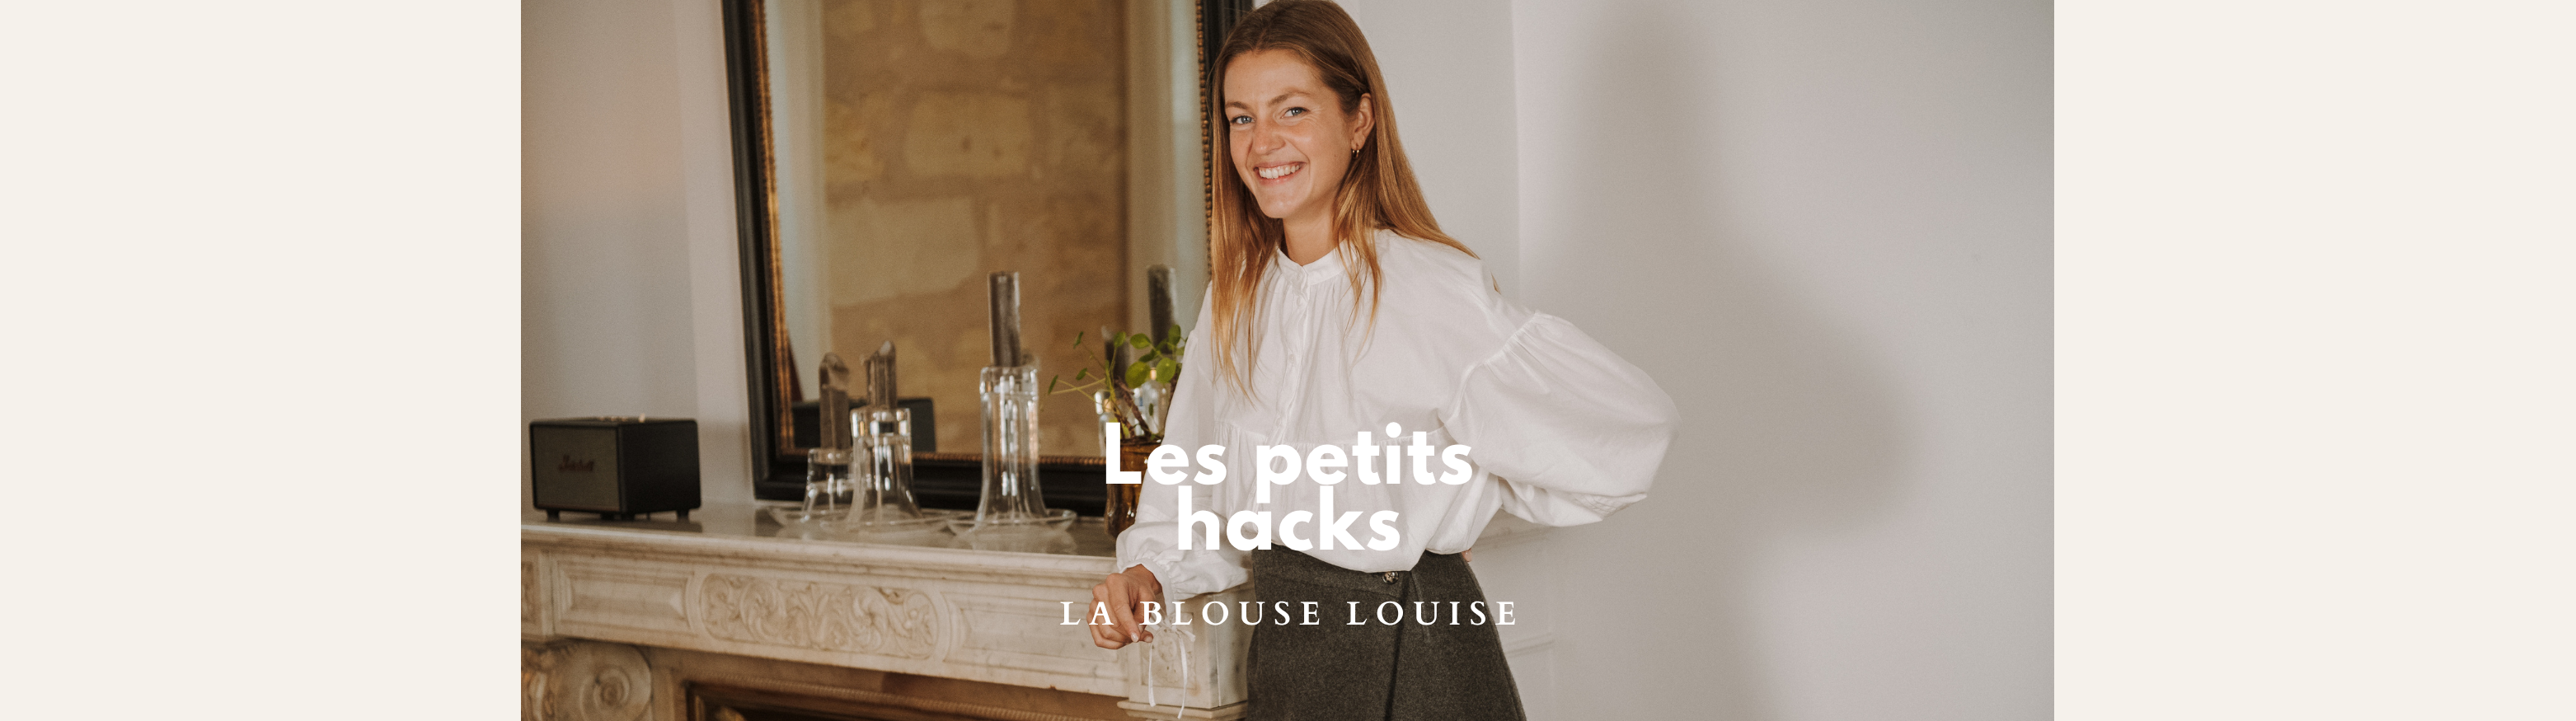
How about giving your Louise blouse a little twist? This pretty, bohemian-style blouse with its puff sleeves adds a touch of elegance to your outfits. Today, we're offering a simple tip to personalize it with a unique collar and inverted pleats on the sleeves , giving it an original and sophisticated style.
Materials needed:
Before you begin, make sure you have these supplies on hand:
- Fabric of your choice for the blouse
- The Louise pattern ( available right here )
- The pattern for a collar stand that you like; we used the one from our Clémentine shirt ( available right here ).
- Sewing scissors
- Pattern paper
- FriXion pencil
- Iron
The modification of the collar:

Step 1: Prepare the pattern
- Start by assembling your Louise pattern (steps 1.1 to 2.2) to obtain the front and back bodices assembled.
- Do not perform step 2.1 concerning the preparation of the button tabs and the making of the notch, but assemble the two button tabs correctly.
Step 2: Retrieve the collar stand from another pattern
- Obtain a collar stand pattern. For example, we chose the collar stand from our Clémentine shirt (piece no. 6 of the pattern).
- Create gathers all around the neckline of the Louise blouse.
Step 3: Prepare the neck

- Place the two collar stand pieces right sides together. Sew 1 cm from the edge, starting and ending the seam 1 cm from the ends.
- Trim the edges, clip the corners, then turn the collar stand right side out. Shape the edges into neat curves and press the seams flat to secure the collar.
- Pre-fold one of the two seam allowances of the collar.
Step 4: Assembling onto the blouse
- Position the unfolded seam allowance on the right side of the blouse, respecting the notches: front, shoulder and center back.
- Pin, distributing the gathers evenly. Sew 1 cm from the edge, then press the seams upwards.
- Next, place the pre-folded margin over the previous seam and, according to your preference, make an invisible seam or a topstitch all along the collar.
This modification gives the blouse a new style, making it more accessible and quicker to sew!
The religious folds of the sleeves:

Step 1: Modify the pattern
- To add a pleat detail to the sleeves, start by obtaining the Louise sleeve pattern.
- Add 10 cm to the sleeve length, starting from the elbow line. To do this, draw a line along the elbow line, then cut out your pattern using paper scissors.
- Place pattern paper under the cut and add 10 cm in length. Redraw the side lines of the sleeves.
Step 2: Create the folds
- Cut out the two sleeves with the new pattern, then make three flat pleats of 1 cm each.

Neat, even pleats add an elegant and sophisticated touch to a garment. Here's how to create them:
-
2.1 - Fold marking
Using chalk or a fabric pencil, mark the fold line (where the fabric will be folded) and the stitching lines (where you will sew) on the wrong side of the fabric. Repeat this three times to create the three folds. -
2.2 - Preparing the folds
Fold the fabric right sides together along the marked fold lines. Secure the folds with pins or use an iron to crease them sharply. -
2.3 - Sewing the pleats
Stitch a straight line along each marked seam line, following the intended width for the pleats. Make sure to keep each pleat flat while sewing for a neat and even finish. -
2.4 - Ironing the creases
Once the pleats are sewn, open the fabric and carefully iron the pleats so that they remain well defined.
Step 3: Finishing the blouse
Once the religious pleats are made, continue assembling the sleeves according to the instructions of the Louise pattern and finish your blouse.
Tips for a party look:

Opt for fabrics like satin, velvet, or shimmering materials such as organza for a festive and elegant look. Complete your outfit with our Lisa skirt or chic Camille trousers for a refined style. 🌟
And there you have it! You've just created a personalized version of the Louise blouse, tailored to your style and preferences. Have fun and let your creativity flow!